
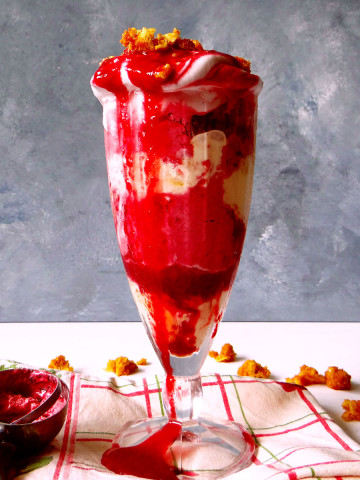
This homemade French vanilla ice cream is rich, sweet, and creamy. Far from being boring, everyone has a soft spot for vanilla ice cream! It’s just as good used as a base for delicious sundaes and milkshakes, as eaten on its own, piled high on a cone (or eaten directly from the container with a spoon, we’ve all been there).

🥚Egg-based custard
Unlike American/Philadelphia-style ice cream, French ice cream is made with an egg-based custard. The presence of egg yolks is what gives homemade French vanilla ice cream its yellow color. Philadelphia-style vanilla ice cream is whiter as the base is made by simply whisking together sugar, milk and cream.
You can’t simply add raw egg yolks into your ice cream base though. You have to gently cook them until they slightly thicken the custard. By cooking (pasteurizing) the custard until it reaches 80°C (175°F), you kill as many microorganisms as possible, making the ice cream safe to eat. It’s an extra step but I find custard-based ice creams to be creamier, richer and less prone to having ice crystals.
Nowadays, I use this recipe as my base for most of the ice cream I make. It’s really reliable and easy to change things up by infusing the dairy with a different extract or by using fruit peels or juices.
🍦 Flavoring
Don’t be deterred by the term homemade French vanilla ice cream. There is nothing fancy or complicated about this recipe. You probably already have all the ingredients needed! You can flavor the ice cream base with either:
- vanilla extract: I usually infuse my custard with vanilla extract instead of vanilla beans, keeping the cost of the homemade ice cream pretty low. You’re definitely not skimping on quality; this ice cream is still deliciously creamy and sweet. It’s just the thing to top off fruity pies or warm crisps! Vanilla beans are expensive, so if I know this ice cream won’t be the piece de resistance for dessert, I really don’t feel the need to splurge. The flavors won’t shine through anyway if served with steaming fruits and buttery crust. Or,
- vanilla bean: If you do want to splurge and make this homemade French vanilla ice cream extra special with a vanilla bean, here is how. Using a paring knife, cut the vanilla bean in half lengthwise and scrape the seeds. Place the seeds in the saucepan alongside the sugar, skim milk powder, milk and cream. Whisk until smooth and the skim milk powder is wholly dissolved. Bring to a high simmer over medium heat, stirring frequently with a wooden spoon. Then, remove the saucepan from the heat, cover it with a lid, and let the mixture infuse for 30 min. After half an hour has passed, bring the mixture to a simmer over medium heat and remove from the heat again. Continue with step 1, as written in the recipe card, by whisking the yolks.

Emulsifier
After years of reading that skim milk powder acts as a great emulsifier in ice cream, I finally tried it, and I’m now a convert! The dehydrated milk absorbs excess water (present in milk and cream) and bonds with the liquid and the fat in the custard. Milk powder thus prevents the formation of ice crystals when the ice cream freezes.
Ice crystals make for icy and grainy ice creams, which we want nothing to do with! Without using an emulsifier, the consistency of my homemade ice creams only remains at its best for 24 hours. However, when I add the powder to the milk mixture, I find that homemade French vanilla ice cream remains creamy and scoopable for several days.
I also find that using skim milk powder in this way is much more effective than adding alcohol (usually 1 tbsp of flavorless vodka) to the ice cream base just before churning. At least when it comes to custard-based ice creams. I haven’t tried this technique with sorbets, which contain a higher percentage of water due to the fruits.
I’m quite happy to have landed on milk powder in my quest for creamy smooth ice cream. Especially since it’s so readily available and it lasts for ages stored in a dark cupboard!
📋 Step by step
This is an overview with step-by-step photos. The ingredient list and full instructions are in the recipe card below.
Step 1: Prepare the custard

Put the sugar, milk powder, milk and cream in a heavy-based saucepan. Place over medium heat and stir until the powder is dissolved. Remove the mixture from the heat just before it begins to boil. Whisk the egg yolks in a mixing bowl. Slowly drizzle a third of the warm milk mixture over the yolks while whisking constantly. Pour the remaining mixture into the mixing bowl and whisk until well incorporated.
Step 2: Cook the custard and churn

Pour the ice cream base into the saucepan and place over medium heat. Cook while whisking continuously until it reaches 80°C (175°F). Dip a spoon into the custard and trace a line across the back of the spoon with a finger. It should leave a clear trace, as the line should remain visible. Pour the custard through a mesh strainer into a clean bowl or container. Whisk in the extract. Cover the custard with plastic wrap, pressing it directly onto its surface. Refrigerate until fridge-cold and then churn your ice cream.

Homemade French vanilla ice cream
- Prep Time: 20 minutes
- cooling: 5 hours
- Cook Time: 15 minutes
- Total Time: 5 hours 35 minutes
- Yield: 1 3/4 pints 1x
- Category: Dessert
- Method: Ice cream maker
- Cuisine: French
Description
This homemade French vanilla ice cream is rich, sweet, and creamy. It’s just as good used as a base for delicious sundaes and milkshakes, or as eaten as is, piling scoops on a cone or into a bowl!
Ingredients
- 150 g granulated sugar (¾ cup)
- 35 g skim milk powder (¼ cup)
- 300 ml whole milk (1 ¼ cups)
- 360 ml heavy cream (1 ½ cups)
- 5 egg yolks
- 2 tsp vanilla extract
Instructions
- Prepare the custard. In a medium heavy-based saucepan, combine the sugar, skim milk powder, milk, and cream. Whisk until smooth and the skim milk powder is wholly dissolved. Place the saucepan over medium heat. Bring to just below a boil, stirring frequently with a wooden spoon to prevent sticking. Then remove the saucepan from the heat. In a mixing bowl, whisk the egg yolks for 2 min until they lighten. While whisking constantly, slowly pour the warm milk mixture into the mixing bowl. It’s essential not to pour all of the milk at once so the yolks don’t get too hot too quickly and you don’t end up with scrambled eggs. So be patient. Mix well until completely combined.
- Cook the custard. Pour the mixture back into the saucepan and place over medium heat. Stir constantly with the whisk, ensuring that you scrape the bottom of the saucepan as you stir. Cook and stir until the custard reaches 80°C (175°F), about 5 to 10 min. For a more accurate reading, I prefer to check the temperature with the pan off the heat, after having whisked the custard well. Check the temperature in several places in case your saucepan has hot spots. Be careful with the temperature and never leave the custard unattended. If it gets too hot, the egg yolks will form clumps, or the custard might curdle. The custard should coat the back of a spoon, but it shouldn’t be as thick as pastry cream or curd. Aim for the consistency of single cream. Stir a spoon into the custard and immediately trace a line across the back of the spoon with a finger. It should leave a clear trace, as the line should remain visible. It means your custard is thick enough and ready.
- Let the custard cool down. Pour the custard through a mesh strainer into a clean medium-sized mixing bowl or plastic container. Whisk in the extract. Cover the bowl with plastic wrap, pressing it directly onto the surface of the custard, and let stand until the bowl reaches room temperature. This can take up to 1 h. If you want to speed things up, you can fill a larger bowl a third of the way with cold water and add a big handful of ice cubes. Gently lower the bowl/container with the custard into the ice bath bowl (be careful that no water from the ice bath flows or splashes into the custard while doing so). The custard will cool down to room temperature much more quickly.
- Chill and churn. Refrigerate the custard until it is thoroughly cold, about 4 hours (or leave it overnight in the fridge if it works better for you). Whisk briefly before transfering the cooled custard to an ice cream maker and churn according to the manufacturer’s instructions. Transfer the ice cream to a container that has a tight-fitting lid and cover the ice cream with plastic wrap, pressing it directly onto its surface. Close the lid and freeze the ice cream until firm, about 4 to 8 hours, depending on the freezer.
Notes
Make sure to let the container sit at room temperature for 5 min before scooping, and directly put the ice cream back in the freezer once served.
Homemade vanilla ice cream can be stored in the freezer for up to 2 months, but it will taste best when eaten within 2 weeks of making it.
Nutrition
- Serving Size: 2 big scoops
- Calories: 607
Do you want to try other ice cream recipes? Here are some of my favorites:


Leave a Reply